Showing posts with label Sewing. Show all posts

Friday, March 14, 2014

Sewing Stuff

I just never get as much sewing done as I would like.  I have big dreams of fabulous sewing projects, but life just gets busy.  And my family always comes first!  I did get a few sewing projects done though & I always feel bad for the recipients of my sewing gifts because they are my guinea pigs as I practice & develop my sewing skills.  Ha ha ha!  Hopefully they like their gifts though!

I made this big tote bag for my sister-in-law for her birthday last year:
 She'd been asking for a big tote bag & this one was big!  And I love the fabric!

2013 was the year of the baby in my husband's family.  There were 4 babies born!  And it seemed to be the year of the boy as 3 of the 4 were boys!  It was fun to shop for boy fabric for a change.  I made baby quilts for the new babies & I really enjoyed making each one.  You'll see a chevron theme on most of them.  What can I say?  I {heart} chevron.  And I feel like it's a great basic pattern that goes with just about anything.  And for quilting purposes it was really easy.  I just bought the large chevron print fabric for the front of the quilt & then a patterned fabric for the back of the quilt.  Then after I layered them with the batting in between I quilted along the chevron pattern for the actual quilting.  It was easy & they turned out great!

This one was for our cousin's baby girl, Saylor:
 I just love yellow & gray together!  And after having 3 girls I really love other colors together for girls besides just pink.

This one was for our cousin's baby boy, Ethan:
 I love, love, love these bold colors together!  
And chevron & polka dots together = I die!

This last chevron quilt was for our nephew, Elliott:
I love this pop of orange with the aqua & gray!

My brother-in-law loves Star Wars & so when I saw this fabric on sale I had to get it!  I just made a simple flannel blanket:
And I love the light blue star flannel on the back.

I also made my sister-in-law one of those infant car seat canopy covers:

 I loved this pattern!  It's not a great picture of how it works as the car seat canopy, but I'm sure you've seen those out & about.

This last quilt was for my great-nephew, Hudson:
His nursery is a nautical theme & when I saw this fabric I just had to get it.  I love the bright colors!

Yay for all these babies so I could practice my quilting!  :)

Monday, April 15, 2013

Random Craft


Did you notice the new header on my blog?  Yes, after having my little blog for 6 years I have decided to change its name.  So long to "One Crazy Stampin' Mama" & hello to "Random Craft."  Why the name change?  Well, I've been thinking about it for a couple of years now actually.  I no longer sell Stampin' Up! products, my crafting has become so much more than stamping & I hardly ever really stamp anymore so I decided to change it up.  I like the name "Random Craft" because that's what I feel I do.  I make random crafts.  I like to craft in general & so you will see a lot of random things on my blog.  Hopefully no one else is already using this title for a blog, I tried looking & it didn't seem like it.  Anyway, I'm trying it out.

So...on to my random crafts of late.

A few weeks ago I decided to make a cushion for the bench in our entryway:

We have had this bench FOREVER.  And it has taken lots of abuse from my children.  There are sticker remnants on the top, crayon marks, pencil marks, etc.  I wanted to make a cushion to cover up all of the markings & to add some color into our family room.  And I didn't want to sew a cushion cover.  So, thanks to some ideas on Pinterest, I made this really fast & easy cushion.  I bought the fabric at JoAnn's & then I bought some thick foam there too.  (Use your coupons for JoAnn's!)  Then I had my hubby get a piece of plywood for me one day when he was at Home Depot.  They cut it to the exact size we needed for the top of the bench.  I used the plywood as a guide to trim the foam to the same size just using a serrated knife.  Then I just laid the fabric out upside down, laid the foam on top of that, laid the plywood onto that & then started stapling the fabric down with my handy staple gun.  Of course, I went slowly, making sure the fabric was pulled tight & that the corners were folded nicely.  Took me maybe 10 minutes & it was on my bench!

I love it:

Now just as soon as little Quinn (14 month) stops eating shoes we can move our tan show bins back into those cubbies in the bench & it will be much more functional again.

We also spruced up the girls' bathroom a little bit:

Gosh.  Sorry my photos are so dark.  Anyway, thanks again Pinterest for these great ideas!  My hubby hung a wood strip along the entire wall of our bathroom where the old towel bar was.  Then we added 5 simple hooks.  Now we can hang 5 towels up instead of just 2.  It is so great!  Especially when we have visitors staying at our house, everyone has a place to hang their towel to dry.  And I love the shower curtain too!  It nicely covers up our outdated tub/shower combo until we can afford to re-do it.  Thank you Home Goods!  

I also printed out these bathroom printables that I found on Pinterest & stuck them in cheap white frames:

They look cute!  And I love the pops of color they bring into our very tan bathroom.  Just search "bathroom printables" on Pinterest & they pop right up.  I'm still trying to decide what color I want to paint that bathroom...

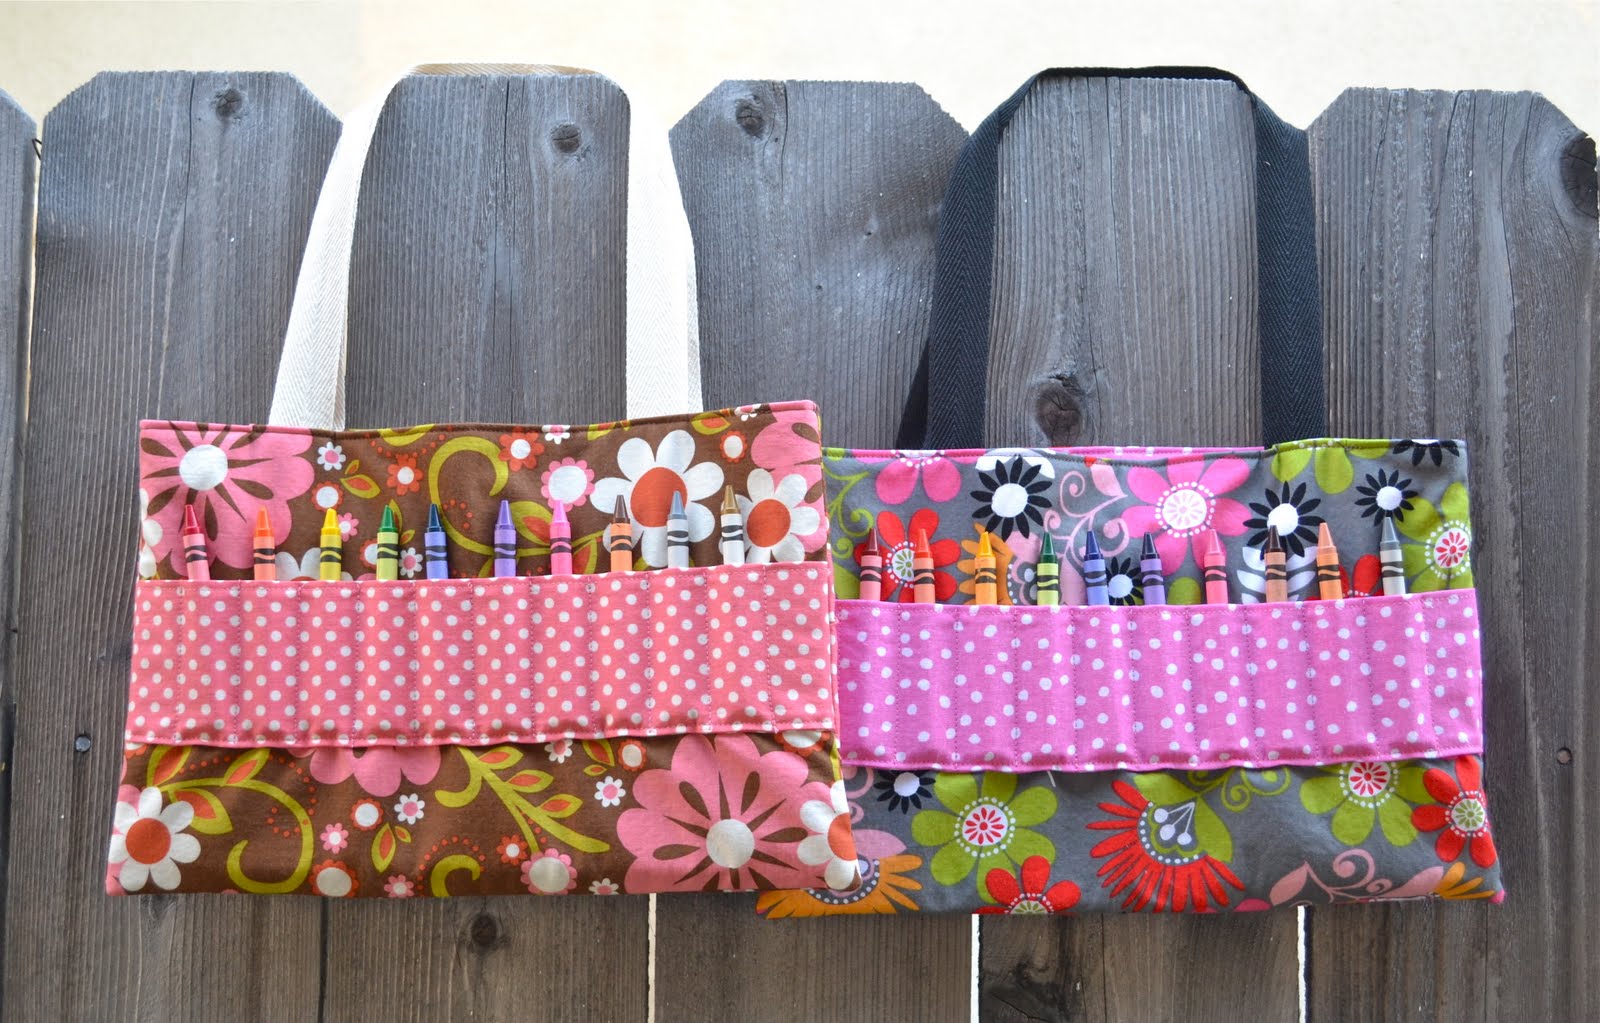
Also a few weeks ago I managed to find some time on a rainy day to make a few more coloring purses.  I made one for my daughter & then 2 others for her cousins.  They all turned out really cute:


These things are so handy & get a lot of use from my girls.

Here's the crayon side:

And then a simple ruffle on the other side:

I made these ones slightly larger than I usually do so that they can hold a full-size coloring book.  
I have to say it was so nice to have my sewing machine out again.  I just love sewing.  It is so fun creating things from just some simple supplies like fabric & thread.  And it is a great stress-reliever!  Well, as long as the kids are asleep!  

Thursday, January 31, 2013

Happy New Year!

I can still say, "Happy New Year" right?  There are still 3 hours left of January!  Well, have you missed me over these past 4 (four!) months?  A LOT has been going on around here.  The biggest thing is that we bought a house & moved at the beginning of November.  It was, of course, crazy moving with 3 kids, but I think we are feeling pretty settled in now.  We also really enjoyed spending the holidays with our family & friends.  Every year the holidays just seem to come & go even faster.  And then we began 2013 with a round of a nasty stomach bug followed 2 weeks later by all of us passing around a yucky head cold.  Ugh!  But most of us are feeling better now & hopefully we can leave the illness behind in January & enjoy a much healthier February!  Anyway, I was scrolling around my photo library trying to see if I've done anything crafty over the last few months that I could share with you.  I did find a few things.

First, look how big my babies are getting:
Whew!  They are keeping me busy, busy lately!  But I love them so much!

So earlier in 2012 I had decided that I wanted to make my girls poodle skirts for Halloween.  In August I bought the felt & poodles & I even made Kaylee's skirt.  Then we found this house, put an offer on it, opened escrow, started packing, etc.  But since I had already started making the skirts I wanted to finish them in time for Halloween.  Luckily these skirts are so easy to make!  Honestly, a circle skirt is probably the easiest & best skirt to start with if you are a beginner to sewing.  I loved how the skirts turned out!  And my girls loved twirling around in them!

Here's Kaylee:

And Aidynn:

And Quinn:

Even though we had just moved, we hosted Christmas dinner at our house this year.  I had gotten the free download for my Silhouette machine for the holiday photo props & thought it would be really fun to have out on Christmas.  They were super easy to put together (Thank you Silhouette!) & they turned out very cute!  Everyone had a blast using the photo props & taking some pictures.

Mommy kissing Santa Claus:

My oldest girlies:

I also made some sugar cookie place cards for Christmas dinner.  I love making sugar cookies.  Growing up we made them quite often & I love making them with my girls now too.  I kept it simple for the place cards & just used a scallop circle cookie cutter & then wrote everyone's names on them.  Then we put them in a little treat bag, tied them up with some twine & set them on every plate.  They turned out pretty cute:


I cannot believe that our youngest baby just turned 1!  This past year just went by way too fast!  I made her a teeny tiny cake for her first birthday party.  It turned out pretty cute for my first time hand piping on a cake.  Luckily it was a tiny cake!  I thought I had a picture of it on my phone, but I guess I don't & I didn't feel like uploading the gazillion photos from my camera right now.  But you can sort of see it there.  
This girl did not waste any time smashing up her little cake:

 I also made a big cake for everyone else to eat & I tried that scallop technique I've seen a dozen times on Pinterest.  I love how it turned out!  I love that it looks great & it was super fast & easy to frost like this.  
Pretty & pink of course:

I also made a couple of tooth fairy pillows for my hubby's partner at work.  They have a little boy & a little girl so they wanted 2 different ones.  Having 3 girls over here I actually had a hard time picking some fabric out of my stash that was boy-ish & a decent print for this small pillow.  But I really love how it turned out.  I definitely dig the teal & green together.

Here's the boy pillow:

And the girl version:

Well, hopefully we can stay healthy over here & I can actually do a little crafting soon!  
Fingers crossed!

Friday, August 31, 2012

Summer Crafting Wrap-up

Hi!  I know, again, it's been a while.  We've just had such a busy summer & it flew by way too fast.  I can't believe that school starts next Wednesday!  Here are the highlights of our summer (& the reasons why I didn't get very much crafting done):
Kaylee had her tonsils out.
Kaylee learned to ride a bike.
We went to Mammoth for a week.
Quinn got 2 teeth.
Aidynn is fully potty trained now.
Kaylee lost 2 teeth.
Aidynn turned 3.
Quinn sits up by herself.
We went to Palm Springs for a few days.
And add in there many fun play dates, lots of house guests, beach days & some swimming.
It's been great!

So although we seemed to be so busy this summer I managed to make a few things.  I was too lazy to get my camera out to take decent pictures, so I'm just using these ones off of my phone from Instagram.  

When Quinn started eating solid foods we got out the bibs that we used with the older 2 girls.  Or, rather, the ones that had lasted through both girls.  Now even though these saved bibs were in decent condition, we soon realized that the velcro no longer held.  Bummer!  So every time we'd feed Quinn she could easily pull her bib off, making a huge mess, or the bib would just fall off by itself.  I grabbed some of my fabric scraps & made some new bibs for her.  Bibs are really easy to make too.  I simply used one of my favorite bibs as a template & before I sewed them I used some iron on vinyl to laminate them & make them waterproof.  On the back of the bibs I just used some soft flannel.  Then I attached snaps because I like them so much better for bibs than velcro.
Here's the assortment of bibs:

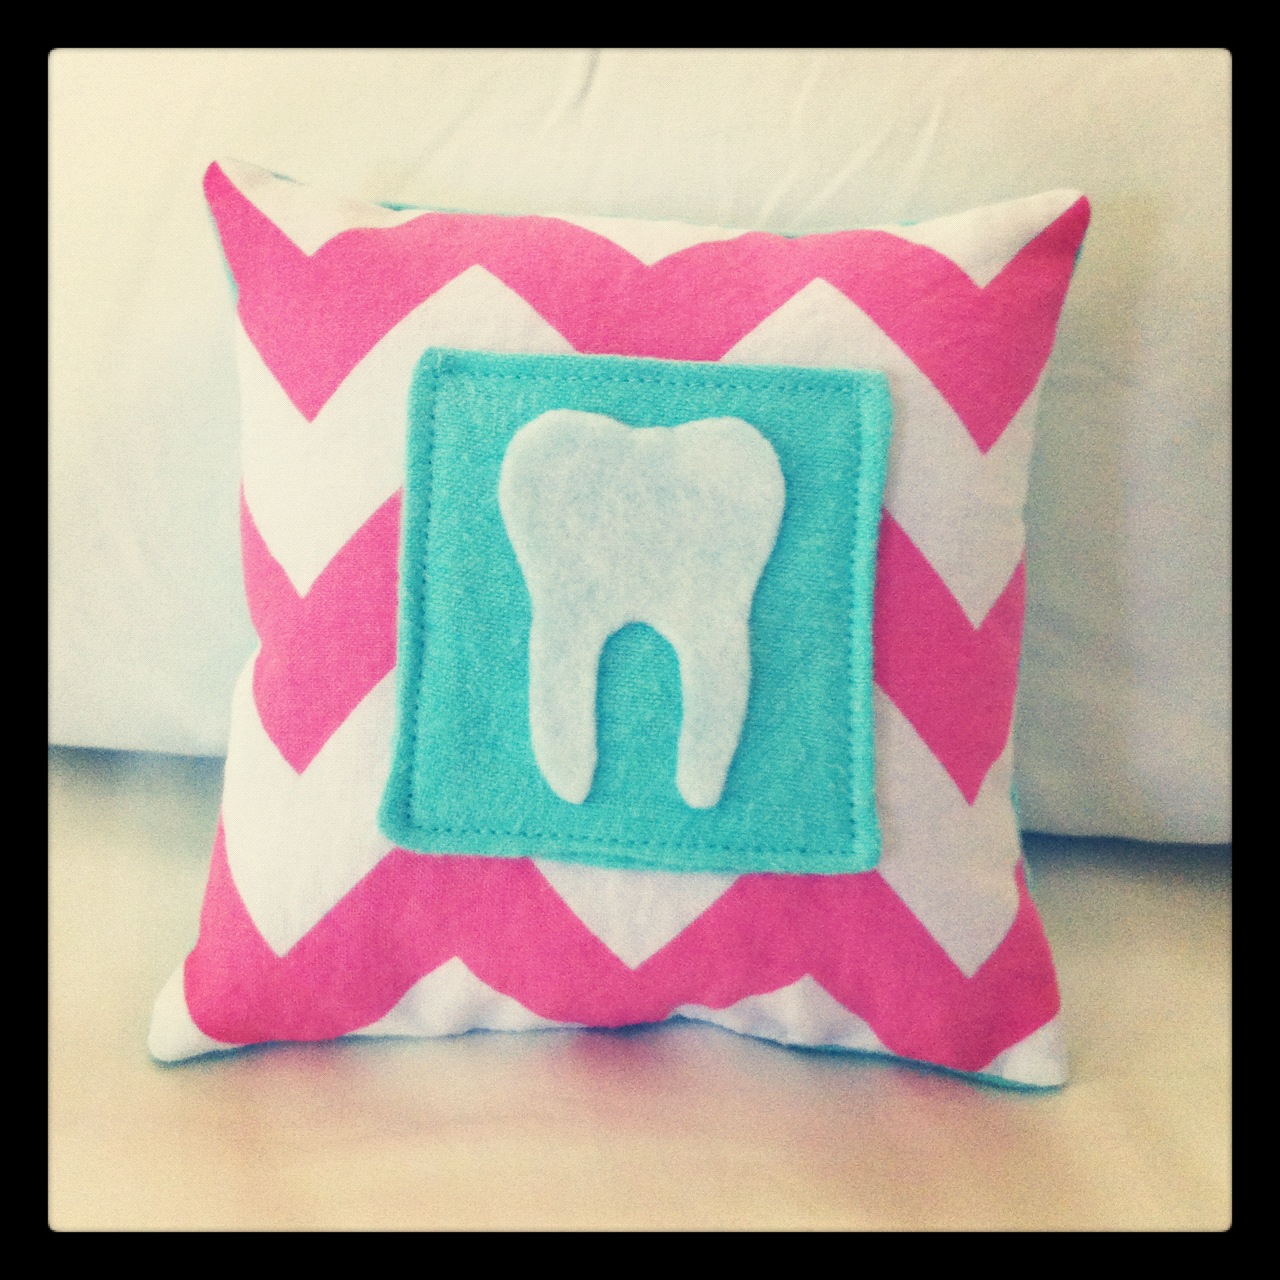
As I mentioned above, Kaylee lost 2 teeth this summer.  Her teeth had been loose for a couple of months & so I knew I wanted to make a little tooth fairy pillow.  Of course I procrastinated making it & she lost both teeth (one day after each other) before I had made one.  So the week after she lost her teeth I finally made her a little pillow.  Now at least she can use it for all of the other teeth she'll lose.  I had splurged & bought this super cute pink chevron fabric over the summer too & had been itching to make something with it.  And I love the aqua flannel that I used to make the little pocket out of & I used it on the back of the pillow too.  I had traced the shape of a tooth on paper & then just used that as a template to cut one out of white felt to glue onto the pocket.  This was such a quick & easy project & I love how it turned out.  I was going to put a K on there for Kaylee, but then figured it's better without because all of my girls can use this same pillow.
Here it is:

I actually did a little sewing for myself too this summer.  Ok, nothing big, but I had bought this cute striped maxi skirt at the beginning of summer & then I never wore it because it was actually too long.  Way too long!  I decided to shorten it & I am so glad I did!  Now instead of this skirt just hanging in my closet not being worn, it is a great length & I wear it all of the time!  And this was just a simple hem job too.  The skirt is knit which can be tricky to sew, but if I use the walking foot for my sewing machine it makes it so fast & easy.
I should have taken a before picture too, but here it is all hemmed up:

And now I'm off to enjoy our last few days of summer!
Hopefully I can get some more crafting done once the girls are back in school!

Monday, March 19, 2012

Back at the sewing machine again!

So Quinn is now 7 weeks old & I busted out my sewing machine again! Yay! My oldest daughter had a birthday party for a friend on Saturday & I knew I wanted to make her one of these adorable crayon purses. I had this leftover fabric which I love, love, love! And these crayon purses are really so quick & easy to make. Well, unless you have a 7 week old & then it might take you a few days to finish like it did me. {smile} And they are so handy for when you want your child to be occupied-church, long car ride, doctor appointments, etc. I know you've seen me make these before, but I thought I'd share this one with you too. Did I mention I love this fabric?

So here is the side with the crayon pockets:
And the other side with a ruffle:
And the inside with a plain pad of paper & a small princess coloring book:
I hope that our friend likes this & gets lots of use out of it!

Tuesday, January 17, 2012

Wet Bag

I made one last quick baby project yesterday-a wet bag. I figure this will come in handy in the diaper bag for any baby items that become wet, you know, from spit up, blowouts, etc. It will be a great bag to throw that wet stuff in & keep everything else in the diaper bag dry. It has a zippered top & then a handle that snaps so that I can hook it on the stroller or anywhere else too.
Isn't the fabric cute? I found it at JoAnn's a while ago in their new Babyville line & I bought a 3-pack of it with one of my coupons, click here to see it online. It's Polyurethane Laminated PUL fabric meant for making waterproof cloth diaper covers, but can be used for a variety of other projects as well. It's polyester fabric with a Polyurethane coating. And it's machine washable which is awesome!

So after I finished the wet bag I packed up my sewing machine & cleaned up my craft area because I am being induced tomorrow morning. The day is finally here! We are going to meet this baby! So I know I won't be doing much crafting for a while as we adjust to this new little princess in our home. So wish me luck & stay tuned for some photos!

Friday, January 13, 2012

Knit Baby Blanket

I have this super soft knit blanket from Gymboree that I love & I used with both of my older girls when they were babies. It is the perfect weight for a blanket-not too thick, not too thin. When I saw this tutorial for a knit receiving blanket over at Make It and Love It last year I realized that I could actually {probably} make one of these blankets myself. And I bookmarked it for a possible baby gift idea. Fast forward a few months & being pregnant with my own baby girl, I found this adorable owl knit fabric at JoAnn's. I love these cute owls so I bought some of the fabric up right away to make a knit baby blanket with. And I finally finished it today! Yay! With only one week left to my due date! I didn't actually know if I would be able to get it done, but here it is:
And I used a cute, bright pink polka dot knit for the back:
Oh it is so soft, I love it! And pink & brown-some of my fave colors together!

So I haven't had much practice sewing with knits before & let me tell you it can be a bit tricky. I decided to try out my walking foot on my sewing machine for this blanket & it really did make a huge difference! It was still a little tricky to sew the knit fabric, but it was much easier than using my regular sewing foot. I think with some more practice it would be a lot better. Don't look closely at my binding, the stitching is definitely not straight since the knits stretch & move a little while sewing. But I still think it turned out pretty well & can't wait to use it with our baby girl!

Friday, December 30, 2011

Nursing Cover

Today I am officially 37 weeks pregnant, which means this little baby is considered full-term! Yay! Now she can come anytime as far as I'm concerned! Of course, now that I've been feeling better & we've hit our goal of keeping her in until 37 weeks, she'll probably be stubborn & arrive late. We shall see! In the meantime I have been trying to keep myself busy instead of just waiting around for a baby to come. Well, besides being busy with my two older girls. So I have been making meals for the freezer like mad & I have been slowly working on some more baby projects. My project yesterday was this nursing cover. I had never attempted to make one before. I looked at a bunch of different tutorials before & terms like "boning" & "D-rings" were intimidating me a little. But, yesterday I just decided to go for it. And it was so easy! This project probably took me about 2 hours from start to finish.

The neck strap is adjustable. Hence the need for D-rings. Which, by the way, are not scary at all, but very simple to use. And the boning goes into the top hem so that the nursing cover curves out so you can see the little one while nursing. Again, using the boning was really easy to use.


Then I added a couple of terry cloth pockets to the inside bottom of each corner. These pockets are a great place to store a breast pad & the terry cloth is so handy if you need to wipe up any little dribbles. And of course this is great because you can just throw it in the washer anytime you need to.
A closer look, it's just a square of terry cloth, folded in half into a triangle & then sewn in place when you sew the hem down.
What a great baby shower gift this makes too! It's inexpensive, easy to make & super handy to have!

If you want to make one yourself I recommend checking out the following tutorials, I sort of used a combination of the 2 to make this one:
Nursing Cover Tutorial at Diary of a Quilter
Nursing Cover Tutorial at Our Seven Dwarfs

Tuesday, December 27, 2011

Infant Car Seat Canopy

I managed to get another baby project done! Yay! Sitting at the sewing machine counts as resting right? {wink, wink} I have a car seat canopy that we used with my last little one & it is so handy! It was very cute too, but the fabric was really thin & bright which made it very bright for when she was in the car seat. I wanted to make a canopy that was thicker & darker, you know, so that it will hopefully help to promote sleep when we need it to! I found this floral fabric at Hobby Lobby in AZ a while back & loved it immediately. I bought 2 yards of it & have been waiting for a project to use it with. I love how it turned out for the canopy. I made the straps out of a bright pink polka dot fabric just for fun & I used thick (2") velcro to attach the canopy onto the car seat so that it's really secure.

Here's a picture of the lining fabric:
I used a dark gray flannel. Like I said, I want this to not only keep the baby warm & out of the wandering hands of strangers, but to help keep it dark & cozy in there as well for when it's time for a little snooze. I am so excited I got it done!

Friday, December 23, 2011

It's Done!

Right in time too! We had a little scare last week when I started having some contractions & we thought this baby was trying to escape a little early. Well, 5 weeks early actually. I've had doctor's orders to rest, rest, rest & so that's what I've been doing. We just need to try to keep her in until 37 weeks, one more week to go & then she will be considered full term. Luckily my contractions have been very few & very far between since then so I think the rest is helping. I am so glad that I was able to get all of my Christmas stuff done before I had contractions too. My plan after finishing the Christmas stuff was to move on to baby stuff. So this rest has put a little kink into getting all of the baby projects done that I wanted to (bibs, burp cloths, knit blanket, knit hats, car seat canopy, etc.). But it did finally give me the time to sit down & bind the baby quilt! I finished it yesterday & gave it a wash in the machine & I love it! I love how soft & ripply it gets after you wash it. I just want to wash it a few more time so it really gets that worn-in look & feel. The colors may be a little different than norm for a baby quilt, but that's how I like my baby stuff-with fabrics that you wouldn't necessarily consider "baby." And you know I love pink & brown together.

The back is all the large flower print too & I just love it:
I am so happy that I finished this before she arrived!
Now let's just keep our fingers crossed that she'll stay in for at least one more week!

Monday, December 19, 2011

Handmade Christmas 2011: Insulated Casserole Carrier

Do you remember the insulated casserole carrier I made here? So easy to make & what a great gift for those who cook & carry. It will keep dishes hot or cold. I love the cherry print & the bright red polka dot lining on this one!
Here's the inside:
This is a really fast project to make & is a great gift to give!

Check out the original tutorial from 2 little hooligans here.

Friday, December 2, 2011

Handmade Christmas 2011: Crayon Purses

So you've seen this project here. When I was making that one for my niece, my oldest daughter really, really wanted me to make her one too. I decided to make a crayon purse for each of my girls for Christmas this year. They will love carrying these to church & having their own little purse to hold their crayons & paper or small coloring books. These don't take much fabric & come together really fast too which is great.

Here's a pic of the other side of the bags:
I love the cute ruffle & the big button. I know these are going to be a hit this year!

Monday, November 21, 2011

Handmade Christmas 2011: Shopper Tote

Here's another handmade Christmas present for ya! Can I just say I am so thankful to have Pinterest in my life this year? I have just found some amazing handmade gift ideas & tutorials. Thanks to everyone who is willing to share their awesome ideas on there! So I saw this shopper tote on Pinterest & you can find pictures & the full tutorial at The Crafty CPA. I love this style tote bag! So great for a teacher gift too, or for anyone who loves a good tote bag really. I think next time I would actually make the bag a bit larger & I would make the handles a tad shorter, but it's still a great bag. I did make one change which was that I only measured in 2 inches when boxing the bottom corners & I think the tutorial said to go in 5 inches if I remember right. I love that this bag has 2 outside pockets, one on each side, in between the handles too (it's hard to see the pocket in the photo).

And here's a shot of the inside of the bag:
I always like to use a lighter color lining inside of my bags, just so it's easier to see what's in there. I also love to add 2 large pockets, perfect for your phone & other small items you want to keep handy. Thanks again to The Crafty CPA for the inspiration for this one!

Monday, November 14, 2011

Handmade Christmas 2011: Alphabet Bean Bags

Do you remember my Handmade Christmas 2010 projects from last year? Oh it was so much fun! I love making people gifts & being able to really customize things for them. I am not going to be making as many handmade gifts this year as I did last year, but I thought it would still be fun to post them for you all to see. Maybe inspire you to make some handmade holiday gifts of your own? So here's hoping that I have the time & energy to get all of the projects made that I have planned!

Anyway, here is the very first handmade Christmas gift for 2011-alphabet bean bags.


I made these as a gift for my 2-year-old this year. One of her favorite things to do during her gymnastics class was to play with the bean bags. And since she follows right along with her big sister & is already starting to learn a few letters, I thought I would make them alphabet bean bags. Well, really she just knows A for her name, but soon enough she'll be ready to learn the others too.

Do you want to make some for yourself? Here's what I did:
They were a little time consuming to make, but very easy. I used my 5-1/2" x 5-1/2" square acrylic ruler to cut 52 squares from the fabric. I so love this fabric, by the way. It's from the Michael Miller Ta Dot collection. So bright & fun! I had first lined the fabric with some fusible interfacing just so that they'd be a little stronger since I know they will get tossed around a lot. Then I used my Silhouette machine to cut out the letters from white heat transfer vinyl. I liked this large chunky font too. I ironed the letters onto half of the squares of fabric. Then I sewed two squares of the same color together, one letter square & one plain square, with the right sides together, leaving a 2 inch opening. Then I clipped the corners & turned each square inside out. I ironed them nice & flat. Then I filled each one with pinto beans. Tons of beans! For this size bean bag I measured out 3/4 cup of beans for each one. (I needed 8 16 oz bags of pinto beans, which I got for $0.38 each at Target.) Then I top stitched around the entire bag, just shifting the beans around inside as I sewed around the entire square, closing up the opening as I did this. And that's it!

They turned out super cute! Much better than I had hoped for & they feel pretty sturdy too. I know they will provide a lot of fun for my girls & will be educational too!