Showing posts with label Baking. Show all posts

Thursday, May 8, 2014

Cake Decorating Party

My oldest turned 8 in April.  
EIGHT!  
I really cannot believe that she is 8 already.  
Stop.  The.  Clock.  Please.  

Anyway, I love celebrating my girls' birthdays!  They get so excited when it's their birthday & I get so happy to make them feel extra special as they turn another year older.  Kaylee, had been talking about her birthday party since she turned seven.  Yes, she loves a good party & loves to help with the party planning too.  As her birthday got closer we told her she could have a small party at our house with a few friends.  She quickly decided that she wanted a crafty party.  A girl after my own heart!  When I asked her what crafts she wanted to do she told me cake decorating & jewelry making.  Ok then!  

Kaylee & I went to Hobby Lobby one day & shopped for everything for her party.  I think we got just about everything for her party at Hobby Lobby!  She chose some zebra print & pink invitations & we just took that theme & went with it for the whole party.  It was a lot of fun!  Since her birthday was on Easter this year & the weekend before was already booked up, we decided to do her party on the Tuesday during Spring Break.  And it worked out great!  I think the girls liked getting together during their break from school too.  It wasn't a fancy party, but it turned out well & the girls had a lot of fun which was the most important thing!  Ok, enough chatter from me, on to the party details.  And thanks to my friend, Jill, for some great cake decorating party tips!  She had just done a similar party for her daughter that was super cute.

We set everything up in the backyard:
 Luckily it was a nice warm day!  It looked pretty cute too & then it made for easy clean-up after the party.

We hung a simple banner on the fence:

We bought these plain white aprons at Hobby Lobby for the girls to decorate as their first craft & then to wear while decorating their cakes.  We even found zebra & pink iron-on letters that I ironed on with each girl's first initial:
 To decorate the aprons we had a bunch of fabric markers & then we hot glued some flowers & gems on as well.

Yes, Hobby Lobby even sells these convenient bakery boxes:
 We figured these were necessary for each girl to transport her cake home safely.

I just added a simple card stock scallop circle with their name on top of each box:

The best part about this party was that there was a lot that Kaylee could help with in preparing for it.  We had so much fun together!  The majority of the preparation could be done ahead of time too which was great.  We baked the cakes about a week before & then kept them in the freezer.  We also made the buttercream frosting a few days before & kept it in the fridge.  Then the day before her party we frosted the cakes in plain white frosting & kept them in the fridge for the next day.

Good thing we have a spare fridge in the garage:
 We made 10 little cakes & then one larger cake to eat during the party.

The morning of the party we put the frosting in the frosting bags with tips of various sizes & designs.  We also put the edible decorations (sprinkles, flowers, etc.) that Kaylee picked out into foil muffin tins.  Again, I was thinking about easy after party clean-up!
  I love the bright frosting colors she picked out:

 After the girls decorated their aprons they took a snack break (Cheez-Its, pretzels & Capri Suns) while we got out all of the cake decorating supplies.

These girls had so much fun decorating their little cakes:

 Oh yeah, I also started them off with a few simple tips for decorating a cake.  I gave each girl a paper plate too for them to use if they wanted to try out the different frosting tips before using them on their actual cakes.  But I didn't give them any direction because I wanted them to decorate their cakes however they wanted.

They really got into it:


I was a little surprised by how seriously they all took it & how much attention they paid to detail.  The cakes turned out so great! 

I took a picture of each girl with her apron on & her finished cake.  Kaylee included the photo with each girls' thank you card.

Here's Kaylee with her cake:

And my 4-1/2 year old, Aidynn, with her cake:


So being that this was a cake decorating party I wasn't sure what to do as far as serving a cake or some treat that we could put candles in & sing "Happy Birthday" to Kaylee with.  I ended up just making a cake to eat at the party since the girls were going to take their little cakes home to share with their families.

It had bright pink frosting of course, with these cool zebra print candles:

 Make a wish, birthday girl:

 The inside of the cake had a surprise too:
It was zebra print!
I have seen cakes with zebra print inside online many times & I thought it would be perfect for this zebra print party.  I just layered chocolate cake batter & white cake batter 1/4 cup at a time into my baking pans & baked them normally.  I was a little nervous about how it would look when we cut into it, but it looked so cool!  The girls loved it!

It got a little wild on our coordinating zebra print plates too:

After we had cake then my daughter opened her presents & then the girls finished the party by making beaded necklaces & bracelets.  The party was 2 hours long & it was the perfect amount of time to get everything done.  I would say this was definitely another successful party!

Happy 8th birthday, Kaylee-girl!

Friday, March 14, 2014

Baking Stuff

I love to bake!  I get that from my mom.  She loves to bake too.  The problem?  Then I end up eating it!  Ha ha ha!  I didn't actually do too much baking over the past few months just because I have been trying to eat better & if sweets are around, I will eat them.  Luckily we have many neighbors & friends who enjoy being the recipients of the baked goods.  

I made this simple bundt cake for my hubby's birthday:
 Luckily his birthday cake requires very little fuss.  He requests this chocolate chip bundt cake every year.  It is easy & it is so good!  What I also love about this bundt cake is that it's dense which makes it sturdy so it travels well too.  I can't do bundt cakes too often because they are just so heavy, but I'll make this recipe a couple times a year.  If you are in the mood for chocolate, lots & lots of rich chocolate, then this cake is the one!

Here's another pic of the apple decorated cupcakes we made for our annual back to school dinner:
 I saw this idea on Pinterest & they were so easy to decorate-red buttercream, green fruit slice cut in pieces to make leaves & a pretzel rod for a stem.  The girls loved helping with these too!

For Thanksgiving this year I made some pies:
 I'm not a big pie person, but my absolute favorite kind is the Apple Crunch pie (above right).  That's actually the only kind of pie I usually make.  So for Thanksgiving I thought I would branch out & also make a pumpkin pie & cherry pie.  Yum!

We went to my parents house for the actual Thanksgiving holiday & my mom made cupcakes with our girls:
 She had bought one of those little cupcake decorating kits & they turned out really cute!

For some sweet treats for friends during the holidays I dressed up my chocolate chip bundt cake & made them mini:
 Why are they just so cute when they are mini?  And they looked pretty with the powdered sugar "snow" & holly berries.

In January our baby turned 2!  She is SO into Monster's Inc. & Monsters University.  It is so funny!  She drags her little Mike & Sulley stuffed characters everywhere.  So it was just the natural choice for the theme for her birthday party this year.  I saw this Monsters inspired cake on Pinterest & decided to give it a try myself.

I think it turned out pretty cute:


Quinn loved it & that's all that really mattered!  Oh & it tasted pretty darn good too!

Crafty Stuff

Hello blog world!  Wow.  It has been almost one year since I last posted here!  Yikes!  Time really does fly when you are having fun.  I don't have any excuses for not posting for so long other than life is busy!  Even though things have been crazy busy around here I still manage to get my craft on when I can.  I decided to do a few posts with some pics of craftiness from the past year (I have been trying to remember to take pics when I do make something).

Here are the teacher gifts I made for the girls teachers for their end of the year gift last year:  
 I had gone to Utah in May with some friends & we went to this awesome wood/craft store called The Wood Connection.  I picked these cute wood pencils up at that store.  Then I just painted them, added pink glitter to the eraser, tied some silver ribbon around them & put each teacher's name on the pencil in black vinyl.  They turned out great!

When we moved to our new house the big girls decided they wanted to have their bunk beds separate for a while.  I decided they needed something above their beds.  But I didn't want anything too heavy (hello, we have earthquakes here!) so I just painted a canvas in a pink that coordinated with their bedding, painted a wooden letter of their initials white & glued it on the painted canvas:

 The pictures are from my phone & they are horrible!  Ha ha ha!  But they look really cute in person.

Then I painted some Ikea wooden spice racks white & we hung them on the wall next to each girls bed so that they could have a little shelf to put their reading books on:
 I know you saw that idea on Pinterest too.  But it works out great!  They love their little shelves.  Oh & the cute pink reading lights are from Ikea too.

My Aidynn has always wanted long hair.  She talks about it all of the time.  So for her 4th birthday last July I made her a Rapunzel braid:
 Isn't she darling?

Here's a better view of the braid:
 This was so fast & easy to make & it was by far her favorite gift.  It has definitely gotten a lot of use!  To make it I just braided yellow yarn, tied it with some pretty lilac ribbon & then hot glued some fake flowers in different shades of purple all over it.

I made myself a necklace for our family photos:
 I just used wood beads in different sizes & painted them a pretty aqua color.  I strung them onto ribbon & that's it!  It was an easy & inexpensive way to get exactly what I wanted to go with our colors for our family photos.

Speaking of, here's our family photo from last July:
I also made Aidynn a yellow wooden bead bracelet to wear.
(Photo credit:  Shari Hanson of Shari Hanson Photography)

In September we had our annual back to school dinner the night before the new school year began.  Every year it seems I add just a little bit more to it which is fun.  I totally got the idea for the apple plates off of Pinterest.  They looked so cute on our table: 

The chalkboard we use every year on our first day photos:

We also got the easel out for the girls to color on:

And they love coloring on the table when we cover it with paper:

Also inspired by Pinterest, cupcakes decorated like apples:

The annual dinner?  Spaghetti, zucchini & garlic bread:

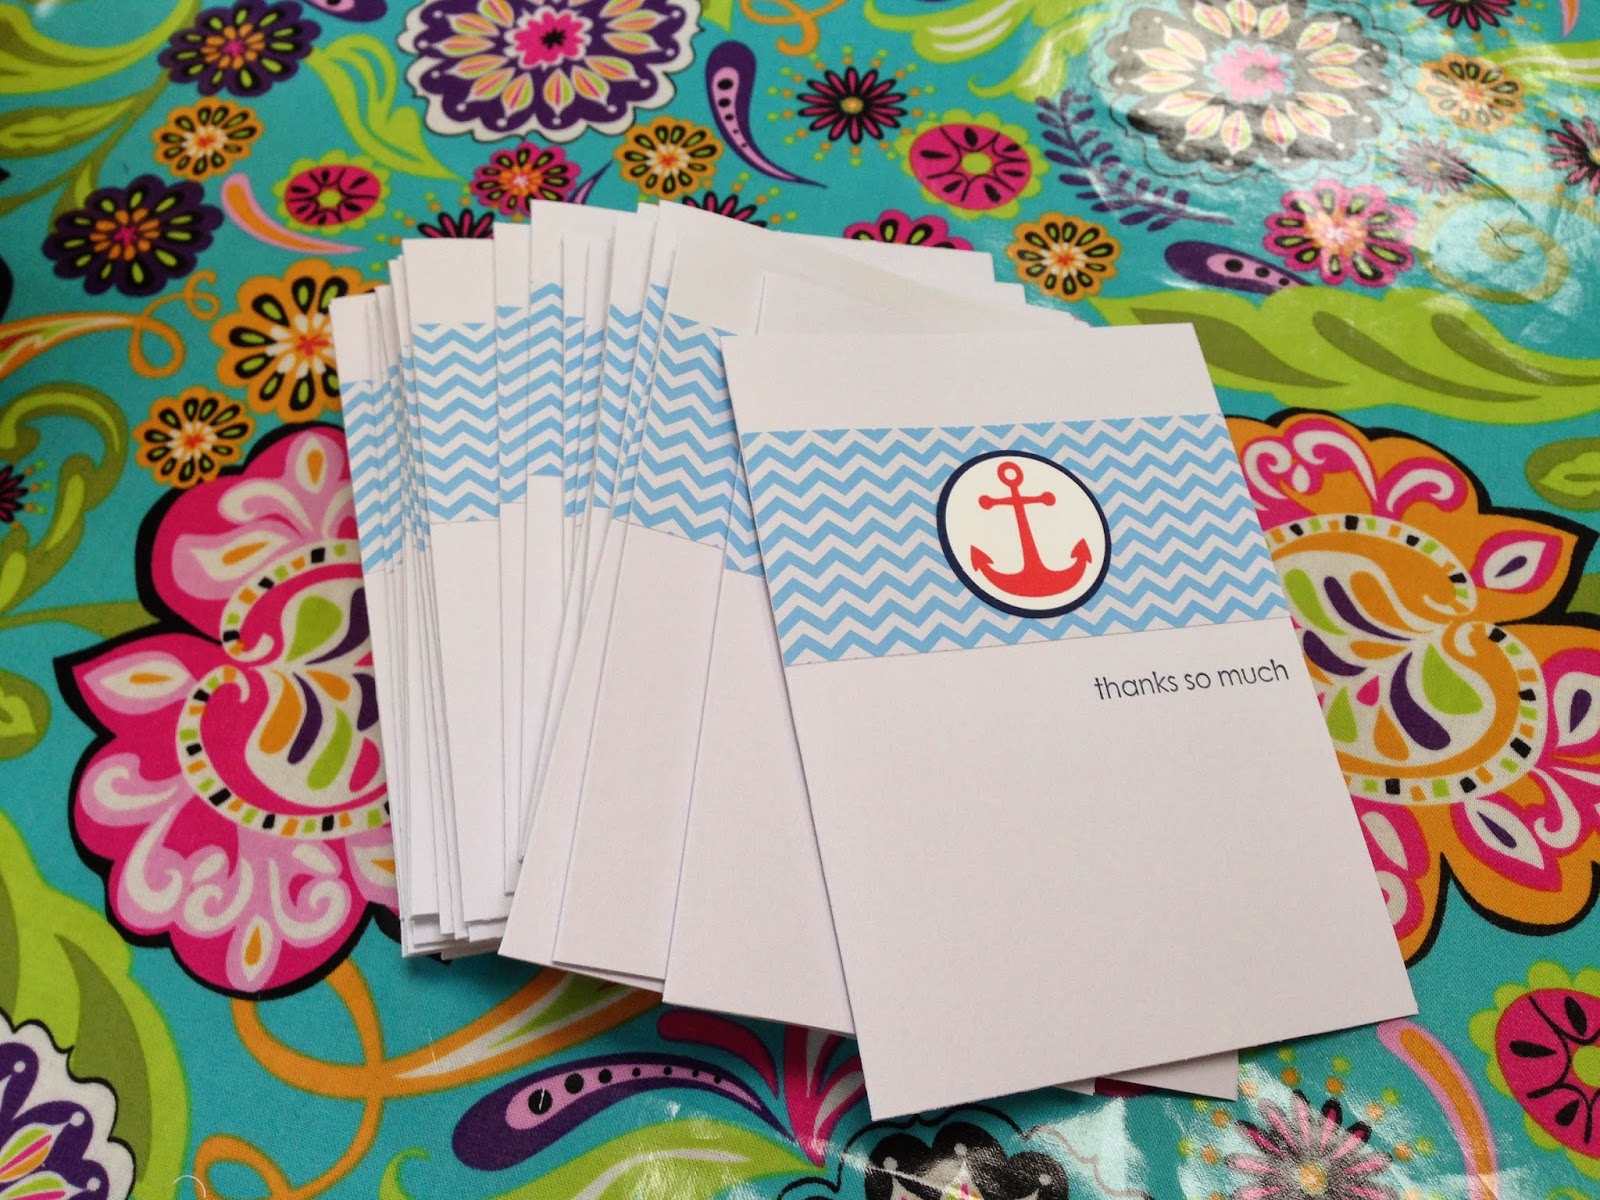
I made my niece some thank you cards for her nautical themed baby shower:
 Simple is always nice.

And a Christmas photo of these 3 beauties:
They keep me busy, but I love them so!

Well, that takes care of some of the random crafts from the past year.  Stay tuned for the sewing & baking adventures!

Sunday, April 28, 2013

Rainbow Cake

My oldest daughter turned 7 last weekend.  Seven!  How did this happen?  How did she get to be seven years old already?  In the past few years I've started asking her what kind of cake she wants for each birthday.  I have fun attempting her requests.  Well lately she has been really into rainbows.  She is quite the artist & she draws rainbows all day.  This year she said she wanted a rainbow cake.  She also said she wanted it to have clouds, grass & a unicorn on it.  
Hmmmmm...  

Here's what I came up with & it turned out really cute:

I decided to just frost it in a light blue color to represent the sky.  Then I used the grass tip (ok, I can't remember what it's called exactly, but it's that frosting tip that has all of the little holes in it so it looks like grass when the frosting comes out) to make some bright green grass around the bottom of the cake. Then I just used my round tips to make the rainbow stripes & the clouds.

To give her the unicorn she wanted I just put a small My Little Pony unicorn on the top of the cake.  And 7 bright pink candles, of course:

Make a wish Kaylee-girl:

For the inside I did this:

If a rainbow cake is what she wanted, then that is definitely what she got!  If you are on Pinterest, then you have seen this idea for a rainbow layer cake I am sure.  I decided to try it out for this cake & it was super cute!  And easy!  Vanilla cake batter, divide into 6 equal parts, tint each part with a different rainbow color, bake, level, layer-done!

And it was so yummy too, we hardly had any left after her celebration:

Happy birthday to my beautiful girl!
(7!)

Thursday, January 31, 2013

Happy New Year!

I can still say, "Happy New Year" right?  There are still 3 hours left of January!  Well, have you missed me over these past 4 (four!) months?  A LOT has been going on around here.  The biggest thing is that we bought a house & moved at the beginning of November.  It was, of course, crazy moving with 3 kids, but I think we are feeling pretty settled in now.  We also really enjoyed spending the holidays with our family & friends.  Every year the holidays just seem to come & go even faster.  And then we began 2013 with a round of a nasty stomach bug followed 2 weeks later by all of us passing around a yucky head cold.  Ugh!  But most of us are feeling better now & hopefully we can leave the illness behind in January & enjoy a much healthier February!  Anyway, I was scrolling around my photo library trying to see if I've done anything crafty over the last few months that I could share with you.  I did find a few things.

First, look how big my babies are getting:
Whew!  They are keeping me busy, busy lately!  But I love them so much!

So earlier in 2012 I had decided that I wanted to make my girls poodle skirts for Halloween.  In August I bought the felt & poodles & I even made Kaylee's skirt.  Then we found this house, put an offer on it, opened escrow, started packing, etc.  But since I had already started making the skirts I wanted to finish them in time for Halloween.  Luckily these skirts are so easy to make!  Honestly, a circle skirt is probably the easiest & best skirt to start with if you are a beginner to sewing.  I loved how the skirts turned out!  And my girls loved twirling around in them!

Here's Kaylee:

And Aidynn:

And Quinn:

Even though we had just moved, we hosted Christmas dinner at our house this year.  I had gotten the free download for my Silhouette machine for the holiday photo props & thought it would be really fun to have out on Christmas.  They were super easy to put together (Thank you Silhouette!) & they turned out very cute!  Everyone had a blast using the photo props & taking some pictures.

Mommy kissing Santa Claus:

My oldest girlies:

I also made some sugar cookie place cards for Christmas dinner.  I love making sugar cookies.  Growing up we made them quite often & I love making them with my girls now too.  I kept it simple for the place cards & just used a scallop circle cookie cutter & then wrote everyone's names on them.  Then we put them in a little treat bag, tied them up with some twine & set them on every plate.  They turned out pretty cute:


I cannot believe that our youngest baby just turned 1!  This past year just went by way too fast!  I made her a teeny tiny cake for her first birthday party.  It turned out pretty cute for my first time hand piping on a cake.  Luckily it was a tiny cake!  I thought I had a picture of it on my phone, but I guess I don't & I didn't feel like uploading the gazillion photos from my camera right now.  But you can sort of see it there.  
This girl did not waste any time smashing up her little cake:

 I also made a big cake for everyone else to eat & I tried that scallop technique I've seen a dozen times on Pinterest.  I love how it turned out!  I love that it looks great & it was super fast & easy to frost like this.  
Pretty & pink of course:

I also made a couple of tooth fairy pillows for my hubby's partner at work.  They have a little boy & a little girl so they wanted 2 different ones.  Having 3 girls over here I actually had a hard time picking some fabric out of my stash that was boy-ish & a decent print for this small pillow.  But I really love how it turned out.  I definitely dig the teal & green together.

Here's the boy pillow:

And the girl version:

Well, hopefully we can stay healthy over here & I can actually do a little crafting soon!  
Fingers crossed!