Showing posts with label Cards. Show all posts

Friday, March 14, 2014

Crafty Stuff

Hello blog world!  Wow.  It has been almost one year since I last posted here!  Yikes!  Time really does fly when you are having fun.  I don't have any excuses for not posting for so long other than life is busy!  Even though things have been crazy busy around here I still manage to get my craft on when I can.  I decided to do a few posts with some pics of craftiness from the past year (I have been trying to remember to take pics when I do make something).

Here are the teacher gifts I made for the girls teachers for their end of the year gift last year:  
 I had gone to Utah in May with some friends & we went to this awesome wood/craft store called The Wood Connection.  I picked these cute wood pencils up at that store.  Then I just painted them, added pink glitter to the eraser, tied some silver ribbon around them & put each teacher's name on the pencil in black vinyl.  They turned out great!

When we moved to our new house the big girls decided they wanted to have their bunk beds separate for a while.  I decided they needed something above their beds.  But I didn't want anything too heavy (hello, we have earthquakes here!) so I just painted a canvas in a pink that coordinated with their bedding, painted a wooden letter of their initials white & glued it on the painted canvas:

 The pictures are from my phone & they are horrible!  Ha ha ha!  But they look really cute in person.

Then I painted some Ikea wooden spice racks white & we hung them on the wall next to each girls bed so that they could have a little shelf to put their reading books on:
 I know you saw that idea on Pinterest too.  But it works out great!  They love their little shelves.  Oh & the cute pink reading lights are from Ikea too.

My Aidynn has always wanted long hair.  She talks about it all of the time.  So for her 4th birthday last July I made her a Rapunzel braid:
 Isn't she darling?

Here's a better view of the braid:
 This was so fast & easy to make & it was by far her favorite gift.  It has definitely gotten a lot of use!  To make it I just braided yellow yarn, tied it with some pretty lilac ribbon & then hot glued some fake flowers in different shades of purple all over it.

I made myself a necklace for our family photos:
 I just used wood beads in different sizes & painted them a pretty aqua color.  I strung them onto ribbon & that's it!  It was an easy & inexpensive way to get exactly what I wanted to go with our colors for our family photos.

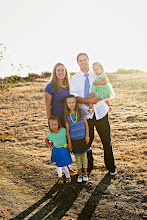
Speaking of, here's our family photo from last July:
I also made Aidynn a yellow wooden bead bracelet to wear.
(Photo credit:  Shari Hanson of Shari Hanson Photography)

In September we had our annual back to school dinner the night before the new school year began.  Every year it seems I add just a little bit more to it which is fun.  I totally got the idea for the apple plates off of Pinterest.  They looked so cute on our table: 

The chalkboard we use every year on our first day photos:

We also got the easel out for the girls to color on:

And they love coloring on the table when we cover it with paper:

Also inspired by Pinterest, cupcakes decorated like apples:

The annual dinner?  Spaghetti, zucchini & garlic bread:

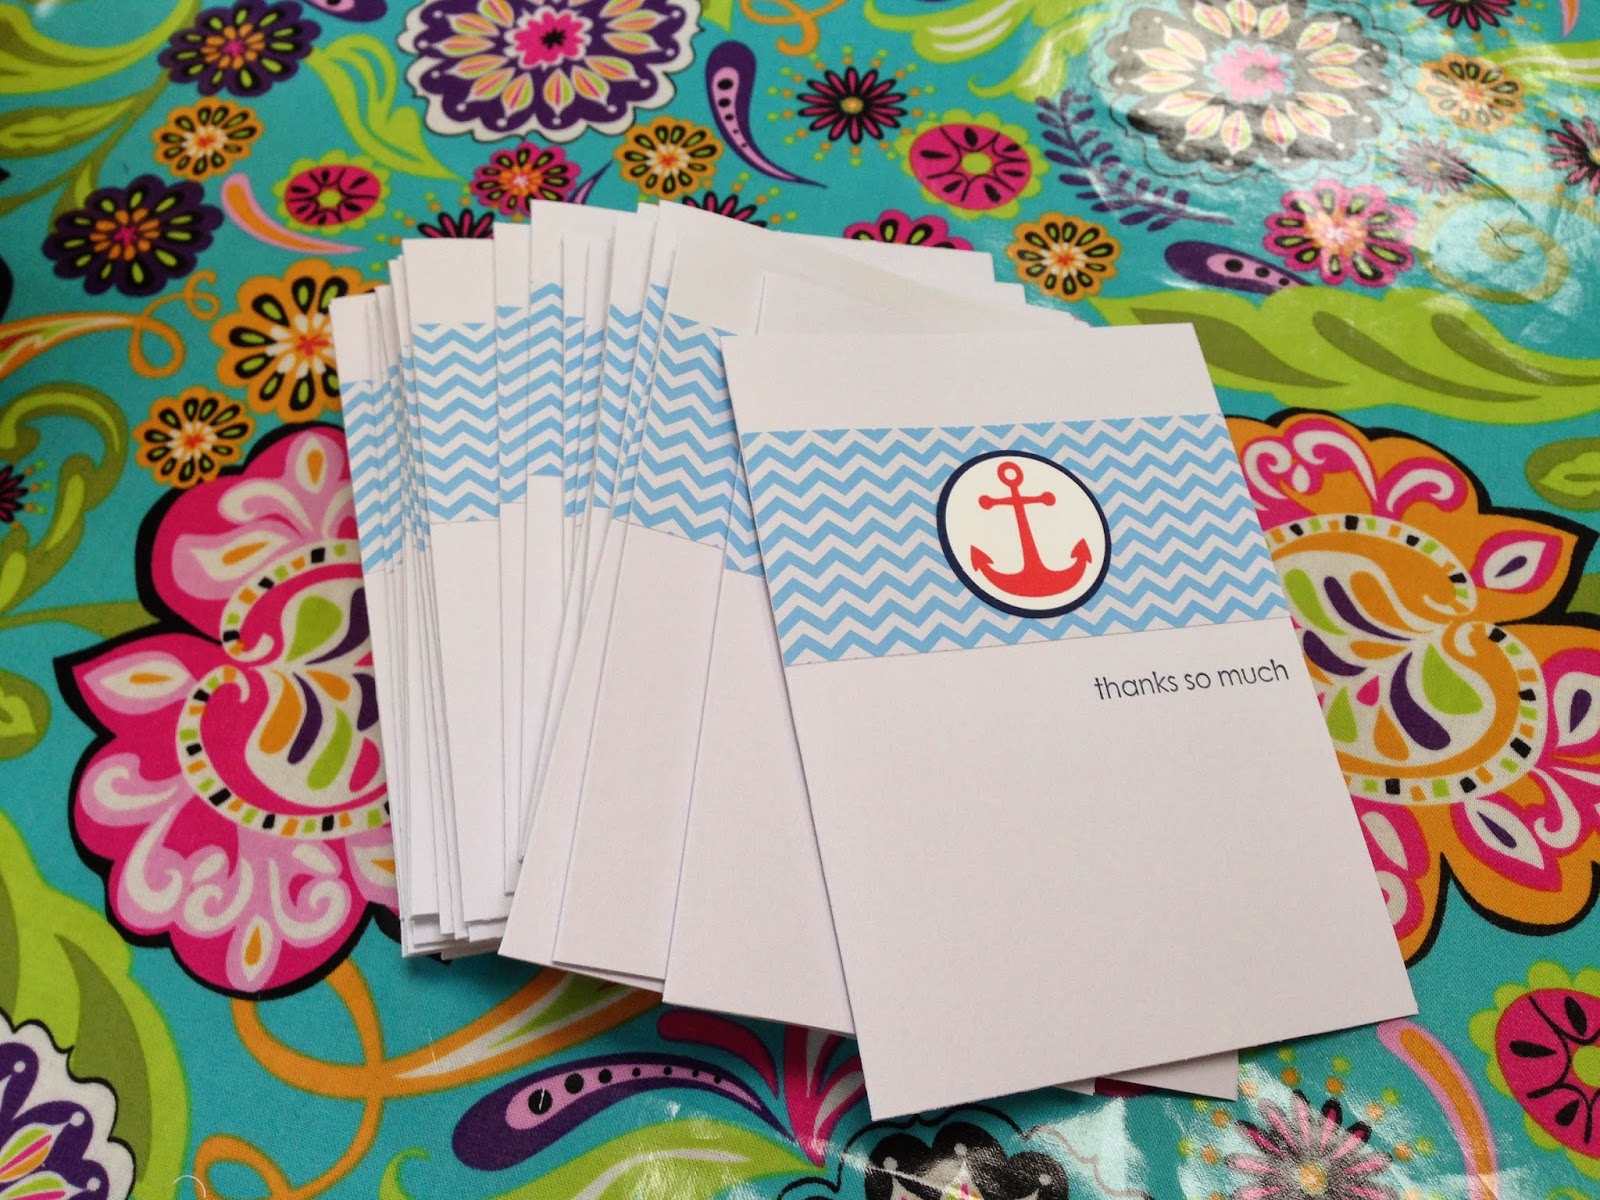
I made my niece some thank you cards for her nautical themed baby shower:
 Simple is always nice.

And a Christmas photo of these 3 beauties:
They keep me busy, but I love them so!

Well, that takes care of some of the random crafts from the past year.  Stay tuned for the sewing & baking adventures!

Monday, January 16, 2012

Girly Thank You Cards

I realized the other day that I already need a few baby thank you cards. And I know I'll probably need some more. I came up with the simple card above. Since I was making a bunch of them I wanted a pretty simple design. And I didn't want a card too baby-themed so that if I have extras I can always use them for other thank you needs later on. But I did want it to be a little girly! It's hard to see in the picture, but I love the pretty doily stamps. I used 3 different sizes & stamped them in a very light pink, a slightly darker light pink & a kraft brown color. I love the rounded corners & the simple scallop brown border. I think they dress up this simple card a bit! Well, another thing checked off the "prepare for baby" to-do list!

Monday, November 7, 2011

Welcome to the World

This is the baby card that I made to go with the gift for my friend's shower. I love the pennant punch! It punches both the triangle & the scallop triangle with just one punch & they layer perfectly! I love the pretty doily designer paper too. This is a very simple card & it was really fast to put together. Unfortunately it was raining outside when I wanted to take a picture so I attempted to rig a spot up inside of my house. My house does not have good natural light, so this is the best I got. The colors look so much better in person! Baby, welcome to the world!

Wednesday, November 2, 2011

Happy Birthday to You

Here's the birthday card I made for my niece. I love the numbered candles in this stamp set. So fun! And, of course, I love pennant banners! Wow, it was really sunny when I took this picture! It kind of washed out the nice chocolate brown on the card. Can you tell I am into these colors lately since I've been working on the quilt for Baby #3? :)

Wednesday, October 19, 2011

Pretty Doilies Card

So a couple of weeks ago I was released from my calling at church as the Laurel Advisor (teaching & working with the 16-18 year old young women). I have to admit this was probably the first time I have been released from a calling that I've actually been really sad about it! I have LOVED spending time with these amazing young women & getting to know them better. Their faith is inspiring & I have grown spiritually myself so much throughout the 18+ months that I served them. I wanted to make some simple cards to send to each one with a little message from me. These cards turned out very pretty. I like how girly they are with the doilies & the lace border. And I didn't even use a single stamp on these! Now I'm off on a new venture in a new calling in Relief Society (the women's program at my church). I will be in charge of planning the monthly Relief Society meetings. Luckily I have a large committee to help me so I know we will come up with some great ideas!

Friday, September 16, 2011

Animal First Birthday Card

We have a birthday party to go to tomorrow for the little boy of some of our good friends so I was in need of a birthday card. He is turning one & he loves animals, so I thought this card worked out perfectly for him! Sometimes it's hard for me to come up with boy cards because I'm so used to girly stuff around here, but I really love the colors & stamp set on this one!

Monday, May 16, 2011

Princess Party Thank You Cards

I decided to try out My Digital Studio to make some thank you cards for my daughter's birthday gifts. There is nothing fancy to these, I kept them really simple. I made them postcards so they are just two-sided.
Here's the front:
Here's the back:
I needed 16 of these so I made the back fill in the blank so that it was easier for my daughter to only have to write a few words on each one. She's not used to writing that much yet, so she actually only wrote about half of them herself & then she just signed her name on the other half & I filled the out for her. This was the first time I had printed anything with the professional printing services that Stampin' Up! offers. They turned out really nice! I like the matte finish of it & the thick weight of the card stock. They were shipped to me super fast too, I was amazed!

Saturday, May 14, 2011

Blank Card

I put 10 greeting cards in the Mother's Day gift box, so this is the last one I did. It's just a blank card. These are great because then you can always customize it for whatever you need at the moment-birthday, thank you, thinking of you, hello, etc.
And I love this design & these colors together:
I think this card is beautiful, and I think because of the colors it would work for a male recipient as well.

Friday, May 13, 2011

Thinking of You Cards

I also made a couple of thinking of you cards for the Mother's Day gift box. These are also good to have on hand.
I love the bird & branch punch on this one:
For this one I stamped the floral image twice-in dark brown & then in a lighter brown. It looks a little fuzzy here though, almost gives me a headache!
I love these colors together though:
Again, these cards were pretty easy & didn't take a lot of time, but are great for when you need to make a lot of the same design.

Thursday, May 12, 2011

Thank You Cards

Here are the thank you cards that I put in the Mother's Day gift box. You can never have too many thank you cards!
I used a new flower punch on this one:
And I am totally in love with yellow & gray together right now:
Both of these cards were very quick & easy to make too-some of my favorite kind!

Wednesday, May 11, 2011

Birthday Cards

Here are the birthday cards that I made to include in the Mother's Day gift box. I wanted to include a variety-feminine, masculine, kids, generic. I think they turned out well.


I love all of the different colors too. Cards just make me happy!

Tuesday, May 10, 2011

Cards in a Box

These were the gifts that I made for Mother's Day this year. My all-time favorite handmade gift to give is a pack of greeting cards. They look pretty just tied with a ribbon, but I wanted to do a little something more for Mother's Day. I decided to re-use the box that the envelopes came in to create a little box to organize & contain the cards & envelopes. I just cut off the lid & the flaps, covered it with some pretty paper, made a couple of dividers & then embellished it a little. It was super easy to make. And I love how they turned out! And I really love when I can re-purpose items. It justifies why I always hang on to everything!

So here is one:
I made 10 assorted greeting cards (I'll post those soon) & also included the blank envelopes:
Here's another one:
This would be a simple, inexpensive gift for any occasion!

I had a nice Mother's Day, I hope you did too!

Thursday, April 28, 2011

The Tohoku Tote

I love love LOVE this tote bag! And, no, I definitely did not come up with this fabulousness on my own. Cheri over at I Am Momma - Hear Me Roar did. Her blog rocks! I love checking out her latest creations. Well after the devastating earthquake & tsunami hit Japan back in March, Cheri decided that she wanted to make it easier for people to donate to the humanitarian effort in Japan by offering the pattern to this bag free with a donation of $8 or more. What a great idea! She calls this the Tohoku Tote because that's where all of the profits will go. Click here to find out more information about the Tohoku Tote & how you can donate to the humanitarian effort in Japan.
I decided to try making this bag for my sister-in-law for her birthday. The pattern was so easy to use & the instructions were so easy to follow! Thank you so much, Cheri! And I love the fabrics I used for this bag. They really went together so well. And the size is great too.
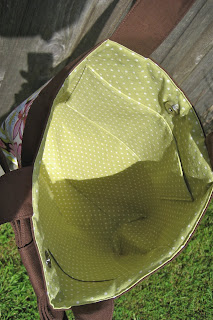
Here's a picture of the inside of the bag:
I added a large pocket on one side & then two smaller pockets on the other side. I was envisioning this possibly being used as a diaper bag too, so I thought the big pocket would be great to contain diapers & the smaller pockets are perfect for your cell phone, car keys, or other small items you want to keep handy.
I love this bag so much that I almost {almost} kept it for myself!

Here's the card I made too, trying to match the fabric on the tote bag:
I just love these bright colors together! So happy!

Wednesday, April 27, 2011

Fun Floral Tote Bag

I made this tote bag for my mother-in-law for her birthday. I love this floral corduroy! And I love making tote bags! They are pretty easy to do & I like changing little things each time I make one so that they are customized for the recipient or for whatever purpose I wish the bag to serve.

I also added a fabric yo-yo flower to the front of this one:
Here's a shot of the inside:
It's hard to tell, but one side has a large pocked & then the other side has a pen pocket plus two other smaller pockets (perfect for a cell phone or something that size).

So you know how I like to make cards to match the gift if possible. This is the card I made to go with the tote bag:
Not colors that I would typically use on a card, but since I was drawing the colors from the corduroy it worked out ok!

Wednesday, March 30, 2011

With a Cherry on Top

I needed a birthday card for Gramma Mugs' gift too, so, of course, I decided to make one that matched her cute quilt. I love the bright, cheery colors of this card, just like on the quilt! And I love the greeting: happy birthday-with a cherry on top. This card just makes me ready for summer!

Wednesday, March 16, 2011

Cupcake Punch Card

I finally used my new cupcake punch from Stampin' Up! It is awesome! It punched out everything you see there on the white square in the middle. So fast & easy! I made this cute cupcake card for my friend's daughter who just turned 2. I always love brown & pink together! Happy Birthday, Avery!

Friday, February 18, 2011

A Quilt-ish Card

I have quilts on the brain right now. One of my crafty goals for 2011 is to make a quilt. It is now the middle of February & I am feeling a little overwhelmed about this goal. But lately I have been doing a lot of research online about quilting so hopefully that will help. I really don't know what I am doing, so we'll see how this goes!
So with thoughts of quilts in my head paired with this new, beautiful designer paper from Stampin' Up!, my sister-in-law's birthday card was created! I love this designer paper! It's called Springtime Vintage & it is divine! It is very feminine & it looks lovely, like real fabric. And you know what? Stampin' Up! sells this as real fabric too! Yummy! I used that for the present that I made for my SIL that coordinates with the card (pics to come in another post). I just love when everything coordinates! This card was very easy to make too. I just punched out nine 1-1/4" sized squares out of nine of the coordinating papers & glued them down on a piece of Naturals Ivory card stock so that it resembled a quilt. I added a vintage flower adornment on the lower right square because it adds a little dimension & it is just so pretty. Then a simple "birthday wishes" stamp & I glued it all onto the Baja Breeze card. I love how this card turned out! Now if only real quilting was so easy!
Monday, February 14, 2011

Happy Valentine's Day

Who waits until the day before Valentine's Day to make their husband a card? Me! So that explains this super simple {super quick} card. I like how it turned out even though it's so basic. I love the look of the five shades of pink/red & the simple "love you" in the corner. And I know that he knows that I love him even if I didn't make him a super fancy, frilly card!
Happy Valentine's Day!

Friday, February 11, 2011

A New Toy for Mama

So my hubby got me a Silhouette machine for Christmas. And a month & a half after Christmas I finally used it. {gasp} I know, I've been busy plus I've been a little intimidated to use it. There is so much this machine can do & it's a little overwhelming at first. But I made my first project with it a few days ago. A princess crown card for my niece for her birthday:
And it was so easy! All I added was a little heart-shaped rhinestone to bling it up a bit. I think that my Silhouette & I are going to be great friends!

Monday, January 10, 2011

One

My youngest niece is one today! I was having some major crafters-block when trying to think up a card to make her. Maybe I'm still recovering from all of the Christmas crafts! Well, this is what I ended up with. I love the colors & it's really simple, but I really like it.
Happy Birthday, Addison Anne!